Excavators are a key heavy equipment piece to many projects.
Sometimes called diggers, most excavators contain the same components. The most recognizable features of any excavation are the boom, dipper, and bucket. Each component comes together to move heavy objects, dig, or demolish them.
But with such immense size and power comes the responsibility of ensuring that you’re operating safely. Proper operation starts with checking equipment before using it. That’s why you must always perform an excavator inspection. Read on to learn how to perform an excavator inspection properly.
Table of Contents
Excavator Daily Inspection Checklist
A daily pre-use inspection is a quick, systematic check of an excavator before the first start-up of every shift. It catches worn parts, leaks, and faulty safety devices before they cause a breakdown or an accident. Most walkarounds take 10–15 minutes and follow the same order every time, so nothing gets missed.
Always follow your machine’s operator’s manual and your employer’s inspection procedures. The checklist below covers the items common to most excavators.
1. Walkaround and Work Area
- Check the work area for overhead power lines, underground utilities, soft ground, and people or obstacles in the swing radius.
- Look at the ground where the machine was parked for fresh oil, fuel, coolant, or hydraulic fluid.
- Confirm there’s enough clearance for the counterweight’s tail swing.
- Check for loose, damaged, or missing parts and guards.
2. Undercarriage and Tracks
- Inspect the sprockets, idlers, track rollers, and carrier rollers for wear, damage, or leaks.
- Check the track links, pins, and shoes for cracks, missing bolts, or excessive wear.
- Check track tension. Tracks that sag too much or are too tight wear quickly and can come off.
- Clear packed mud, rocks, or debris from the undercarriage.
3. Boom, Stick, Bucket, and Quick Coupler
- Inspect the boom, stick (dipper arm), and bucket for cracks, dents, or bent sections, especially near welds.
- Check every pin and bushing for wear, and confirm retaining pins and keepers are in place.
- Inspect the bucket teeth and cutting edge for wear or missing teeth.
- Confirm the quick coupler is fully engaged and locked. An unlocked coupler can release the attachment without warning.
- Grease all pivot points according to the manufacturer’s lubrication schedule.
4. Hydraulic System
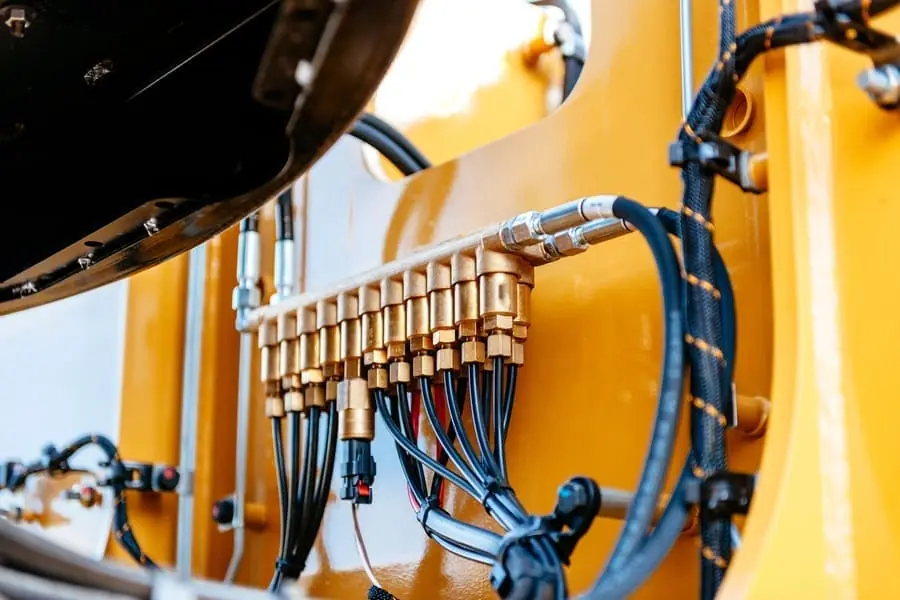
- Inspect hydraulic hoses and fittings for leaks, cracks, bulges, or rubbing.
- Check the hydraulic cylinders and rods for leaks, scoring, or damage.
- Check the hydraulic fluid level with the machine in the position the manual specifies.
5. Engine, Fluids, and Battery
- Check engine oil with the dipstick before start-up.
- Check the coolant level, and inspect the radiator and hoses for leaks or blockages.
- Check fuel level and look for leaks.
- Inspect the air filter indicator, belts, and battery terminals and cables.
6. Cab, Controls, and Safety Devices
- Make sure the steps and handholds are clean and secure.
- Check that the seatbelt latches and isn’t frayed.
- Inspect the ROPS/FOPS cab structure for damage.
- Confirm the mirrors and any cameras are clean and adjusted, and the windows are clear.
- Confirm the fire extinguisher is present and charged.
- Test the horn, lights, and travel and swing alarms.
7. Start-Up and Function Checks
- Start the machine and check that all gauges and warning lights work and show normal readings.
- Let the machine warm up as the manual directs.
- Slowly cycle the boom, stick, bucket, swing, and travel controls. Listen for unusual noises and watch for jerky or slow movement.
- Confirm the hydraulic lockout lever and safety controls work.
- Check the swing brake and travel brakes.
- Note any drifting attachments or unusual behavior and report it before starting work.
What to Do If You Find a Problem
If any item fails inspection, don’t operate the excavator. Tag the machine out of service, report the problem to your supervisor or maintenance team, and write it on your inspection form. Small issues like a weeping hose or a loose pin can turn into a failure or an injury once the machine is under load.
How to Prevent Struck-by Injuries in Construction
Preventative measures that ensure safety on a worksite are called control measures. Here are eight control measures that can help prevent struck-by injuries in construction and ensure a safer working environment.
What Are the Operator’s Responsibilities
As an excavator operator, your first responsibility is to ensure you use the machine safely. This includes going through a heavy equipment inspection checklist before you even turn on the machine. Outside an excavator inspection, your duties as an operator may include:
- Earth or debris removal
- Dump earth or debris in trucks
- River dredging
- Landscaping
- Moving heavy materials around
Importance of Safety in Excavator Training & Heavy Equipment Training
While you may be excited to get in the excavator cab and begin operating, you must understand the importance of safety. OSHA reports that in 2019, an average of 100 workers every week suffered a fatal accident on site. That’s at least 15 lives lost a day. While not every accident can be prevented, practicing safe operation is your best chance to avoid injury or death. You must take safety training seriously to help yourself and your fellow workers stay safe.

Find a Heavy Equipment School Near You
Did reading all of that help convince you to pursue a career in heavy equipment operation or construction? There are plenty of ways to get started—but only one way gives you the safety and practical training employers desire in as little as three weeks. At Heavy Equipment Colleges of America, we’re offering you the chance to get started on a rewarding career fast. Learn more about our programs and find a location near you!
Excavator Inspection FAQs
How often should an excavator be inspected?
Operators should inspect an excavator before every shift. Detailed maintenance inspections follow the hour-based intervals in the manufacturer’s maintenance schedule.
Who is responsible for inspecting an excavator?
The operator usually performs the daily pre-use inspection. Employers are responsible for making sure equipment is regularly inspected and kept in safe working condition, and that defects are repaired before the machine is used.
Is an excavator inspection required by OSHA?
OSHA requires employers to make sure construction equipment is regularly inspected and safe to operate, and it sets specific requirements for earthmoving equipment, such as working backup alarms. A documented daily inspection is the standard way contractors meet these obligations.
How long does an excavator inspection take?
A daily walkaround typically takes 10–15 minutes once you know the routine. Larger machines or machines with attachments may take longer.